Showing posts with label tutorial. Show all posts

Tuesday, March 27, 2012

Easter Burlap Banner and Hurricanes


I was so wrapped up in Valentines and St. Patrick's Day that Easter decor (or lack of) has caught me by surprise. I made a quickie burlap banner this year and love it for its simplicity. 


In addition to bright eggs I added wooden crosses. Easter reminds us of the wonderful hope and salvation Jesus gave us when he died for our sins. In this season of rebirth and new possibilities I hope you will reach out to me if I can answer any questions you have about Jesus. He wants you to know Him, right now and just as you are. Leave a comment if you would like to chat or email  teaganstravels@yahoo.com. I would love to share His truth with you and how He has blessed my life. 


The materials were all inexpensive: a yard of burlap, jute ribbon, scrap book paper I had hanging about, paint and wooden crosses. I used a template from Creations by Kara's Easter banner that made this super easy!


I love my banner and hurricanes that are flanking it on my mantel. Please share more of your Easter decor on my Destination: Inspiration linky party going on now! And do tell what you and your family are doing for Easter this year! I'd love to hear!

Have a great Wednesday! 

Monday, March 26, 2012

Easy Easter Wreath Tutorial!


Happy Monday! I hope you had a wonderful weekend. We were busy with a special first birthday party for our friend's baby Liam, decorating for Easter, going to church and getting out in the beautiful weather we've had here. I can't wait to share pictures this week!

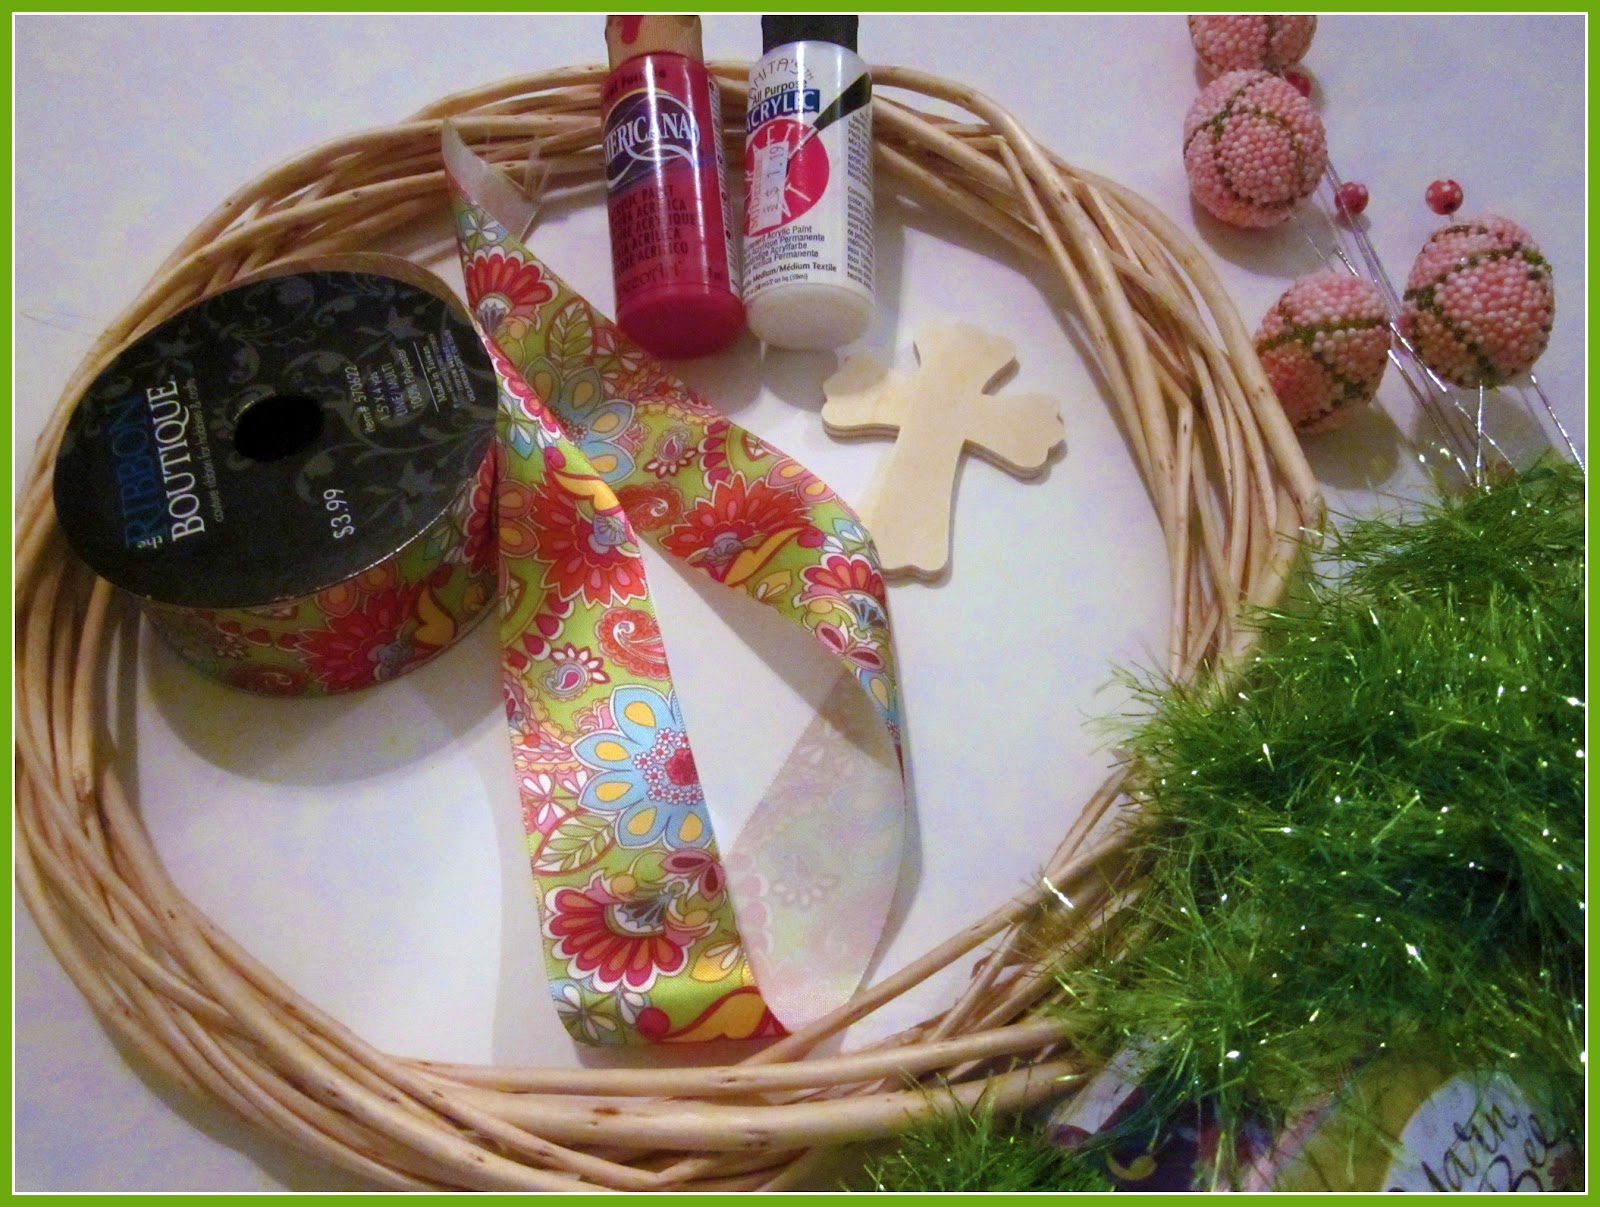
In the meantime, I made this quick and easy wreath over the weekend and love the way it turned out so bright and fluffy! The ribbon has a touch of sparkle and I love the bright colors in the ribbon. Hobby Lobby has tons of new spring ribbon choices this season!


I always love a rundown on how much a project costs and where to find the supplies so here's my scoop: 

I bought the wreath for $1 at Dollar Tree, ribbon from Hobby Lobby for $4, the wooden cross (which I plan to paint a soft gold) was part of a set from Hobby Lobby that included six crosses for $2. I haven't added it yet because I ran out of paint but think it will be pretty on the left side above the two eggs. The spring ribbon was around $5 for four yards so I am using the rest on my mantel. And the eggs were in my craft closet from a floral arrangement I received last Easter!


The project is easy-schemeasy. Just take your ribbon and wrap, wrap, wrap. Here I show how I wrapped the ribbon loosely then scrunched it down in a bunch. This seemed to produce the fluffiest effect. Next, add your embellishments and ribbon. Voila! An easy Easter wreath for just a few dollars. 

I was originally inspired by a lovely wreath created by duitang.com that I saw on Pinterest.  I'd hoped to include a picture but am having trouble with the image. Please do go to this site and see the cute original. This is such an easy, fun wreath! I hope you will give it a try!

Stay tuned for pictures from Liam's 1st birthday party, an Easter craft play date, a burlap Easter banner tutorial and tonight's Destination: Inspiration Tuesday crafty linky up!

Michelle

Saturday, February 18, 2012

DIY: Pop of Shamrock Color Vase Fillers!

A few weeks ago I became inspired to show some love to two of my candle holders after reading about the beautiful seasonal ways Amanda from My Heart's Desire uses her hurricanes. What an amazing transformation she makes in her home using very simple materials to create a festive look! In the past I've just been bored to bits by my little hurricanes and without a clue on what to do with them. But after reading Amanda's post I gave mine a spruce up and am ready to show them off on my mantel for the upcoming St Patrick's Day!

Here's a little tutorial on how I achieved this look. First, I didn't like any of the vase fillers available at my Michael, Hobby Lobby or A.C. Moore. Instead, I took a plain (and cheap!) bag of lentils that we had and used some pretty olive green metallic paint I had for a previous project. After I added the paint Teagan had a blast shaking them with all her might in a sturdy Ziploc bag! Finally, I put them out to air dry on a piece of wax paper for about an hour though they dried super fast even without having to turn them. 


Once they were dry I added the lentils to the vases. I used a full bag for each vase but felt it needed a bit more. My husband thought this picture was funny as I have "borrowed" one of Isla's toys to give the candle more height. Thank you letter "E" from the Alpahbet Train!

Finally, I added a bit of gorgeous ribbon I got at 40% off with my trusty coupon at Hobby Lobby a few weeks ago. Here's the finished product with our Irish buddy Padraig. See him bringing the turf in? Brian's parents have the most amazing stove on their Irish farm that burns this form of fuel! I love the way it smells and it brings back happy memories.

That's it! Easy-schmeasy, inexpensive and it adds so much color! This green holiday is huge in our family especially because it is a fun way to feel connected to our family and friends in Ireland! And I can't lie. As much as I have pink-a-fied my toddler's world she insists that her favorite color is green. Soooo funny. I can actually hear my little Teagan right now. She's having breaky with Daddy and telling him in a super enthusiastic voice, "Green is my favorite...but Daddy! Greeeeeeeeeeen is my favvvvorite!!!"  I think we got it little Tea. So off I go. We are getting in the verde mood and I can't wait to reveal our Paddy's decor this week!

Have a great Sunday everyone!
Michelle